Make Shoe Racks From These 2 Basic Materials
Whether for a store, a garage sale, or even to put it at home as an object of decoration and organization, shoe racks are practical and beautiful. Interested in knowing how to make them with just a few materials?
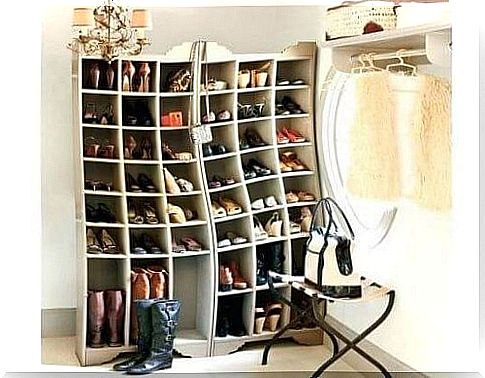
No doubt we have different shapes, sizes and structures; shoe racks are not only useful for displaying goods, they can also be an important decorative element at home, if we opt for the smaller ones.
Check out some tips for creating your own!
How to create shoe racks with wood
1. Traditional shoemakers
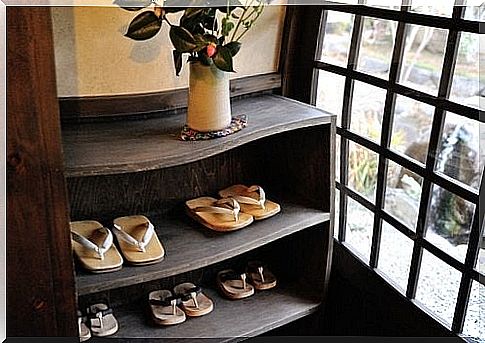
The first option we listed is one of the simplest. This is a great idea for small spaces or for those people who like practicality.
We will certainly have several woods to make this model, in addition to certain carpentry elements such as screws and a screwdriver. If you can get some help, it will certainly be helpful.
The amount of boards will depend on how many shelves or floors you want to form. The length, on the other hand, will depend on the space we have; in relation to width, we recommend about 25 centimeters to fit all types of shoes.
- Once you have the wood, cut rectangles for the supports. These will be arranged vertically to create the necessary separation between each shelf.
- Definitely, the supports should be placed about 5 or 6 centimeters from the ends of the wood. On the other hand, these rectangles will later serve to divide the shelves between them; is a great strategy for creating multi-story shoe racks.
- Instead of placing the vertical supports aligned, it is recommended to place them a few centimeters apart between each floor.
- Finally, the process for fastening them is simple: place two screws vertically on each piece. To make it look better, do not place the vertical boards in a straight line, but with a few centimeters of difference.
This “disparity” will not affect the stability of the furniture and will bring a very eye-catching aesthetic effect.
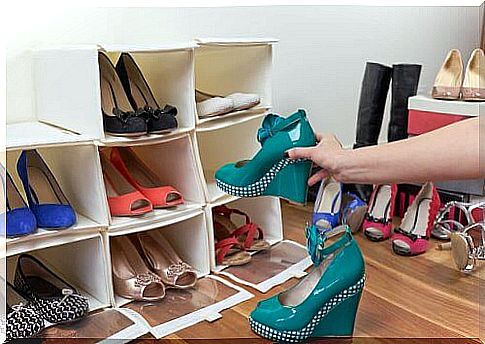
2. Shoe racks with boxes
So, did you know that wooden boxes, like vegetable boxes, have many uses beyond their original use? One is that they allow recycling to create shoe racks with only one stack.
So the procedure for making them is quite simple. First, leave the boxes in good condition; that is, use sandpaper to remove any roughness, add nails where you need to drill them and paint them with an aerosol in the color you like.
Soon after, place them in the place where the shoe rack will be. If they fit well and you like how it looks, start putting silicone on the ends to secure them and avoid accidents with their use. You can even add a little on the back so they hang on the wall.
Another recommendation: to get a nice and not-so-homogeneous structure, you can place some boxes vertically and others horizontally. To gain space on the verticals, it’s good to add boards that divide them and form an extra shelf.
Cardboard shoe racks
In addition to the infallible wood, cardboard can also be very versatile for this type of furniture. This shoe rack will feature several small pyramidal structures. All together, they offer a space to fit individual shoes.
- You will need some unarmed cardboard boxes, shredded newspaper, varnish, silicone, glue and tape.
Then follow these steps:
- First, cut 45 x 30 cm cardboard rectangles. Make two folds along it, 6 inches apart and from its nearest edge. Join the ends together with silicone to form a triangle and secure the joint with tape. Make as much as you feel is necessary.
- On the other hand, cut out another cardboard triangle of the corresponding size to cover all the triangles located next to each other. Remember the width must be 30 centimeters.
- Once you have the floors you want, glue the triangles with silicone and also the bases.
- Finally, make a mixture of glue and water in equal parts and use to glue the pieces of newsprint onto the cardboard.
- Let it dry for a couple of days and, as a final touch, paint and varnish in whatever color you like most. You can also leave the newsprint in plain sight; it looks fantastic.
In conclusion, shoe racks can be made very easily with just a few objects. If we don’t have them at home, we can quickly get them anywhere. Don’t wait any longer and start creating to give these shelves the use you want!